
Side Dishes
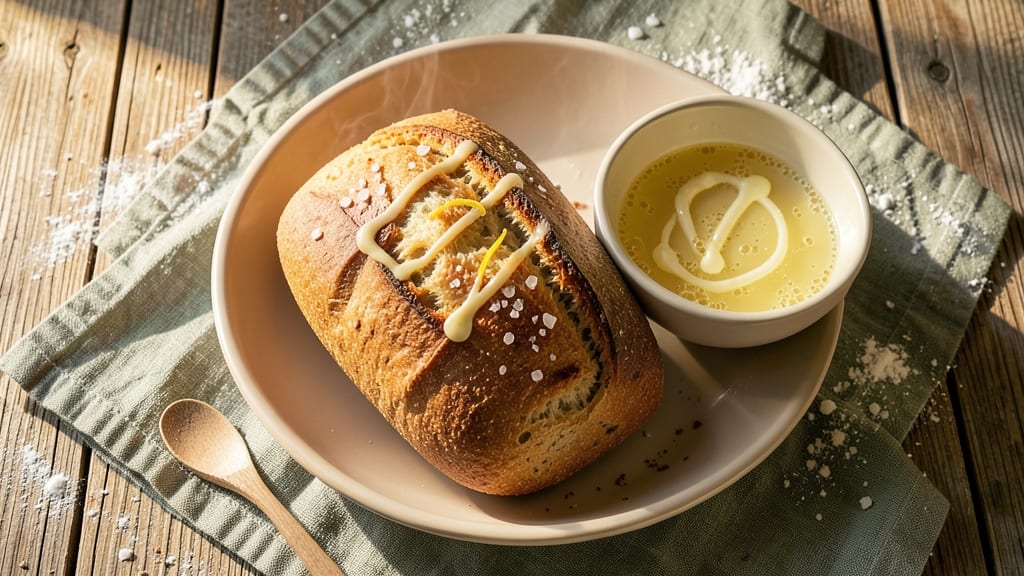
A 60-minute bread recipe that delivers restaurant-quality results in under an hour is finally possible—no years of experience required. This recipe transforms simple ingredients into a loaf with a crisp, golden crust and an airy, tender crumb that's perfect for sandwiches or toast.
The secret lies in precise timing and technique, ensuring your bread rises beautifully and bakes to perfection without overworking the dough.
What makes this recipe stand out is its balance of simplicity and professional results. You'll use just five basic ingredients—flour, yeast, sugar, salt, and warm water—to create a dough that develops flavor as it bakes.
The kneading process is straightforward, and the baking time is carefully calibrated to give you that ideal texture: a crisp exterior and a soft, fluffy interior. No fancy equipment is needed, just a standard mixing bowl and a loaf pan.
By the time you pull this bread from the oven, you'll have a loaf that looks and tastes like it came from a bakery. The aroma alone is enough to make your kitchen feel like a cozy European café.
Brushing the warm bread with melted butter or a light honey glaze adds an extra touch of indulgence, making it perfect for serving alongside soups, salads, or as a side to any meal.
This recipe is designed to be foolproof, so even if you're new to baking bread, you'll achieve impressive results. The key is patience during the rising stages and attention to the baking time—just 60 minutes from start to finish.
Whether you're feeding a family or treating yourself to homemade bread, this method delivers every time.
Ingredients for 60 minute bread
Five simple ingredients transform into a bakery-style loaf in under an hour.
| Ingredient | Amount | Notes |
|---|---|---|
| All-Purpose Flour 🌾 | 3 ½ cups | Spooned and leveled, not packed |
| Active Dry Yeast 🍞 | 2 ¼ tsp | Fresh yeast if available |
| Granulated Sugar 🍚 | 1 tbsp | White or brown sugar |
| Salt 🧂 | 1 tsp | Kosher or sea salt |
| Warm Water 💧 | 1 ¼ cups | 110°F, not hot |
| Unsalted Butter 🧈 | 2 tbsp | Melted for brushing |
| Large Egg 🥚 | 1 whole | Optional for extra richness |
| Olive Oil 🫒 | 1 tbsp | For greasing loaf pan |
The flour is where magic happens—King Arthur or Gold Medal brands rise beautifully. Yeast is the MVP: Bob’s Red Mill active dry yeast is my go-to, but check the expiration date (it’s good for 6 months past the label). Warm water should feel like bathwater—not hot, not cold. Too hot kills the yeast; too cold makes it sluggish. The sugar feeds the yeast, so don’t skip it. Salt balances flavor—use kosher or sea salt for even distribution. For the butter, Land O’Lakes unsalted melts smoothly, but any brand works.
No yeast? Instant yeast at half the amount works in a pinch. Swap brown sugar for white if you’re out, but the yeast will wake up slower. No egg? The bread’s still great—just skip it. Olive oil substitutes? Vegetable oil or melted butter both work for greasing. The loaf pan? 5x3-inch is ideal, but any standard size fits. If your flour’s old (over 6 months), toast it in a dry pan for 5 minutes to freshen it up. And yes, you can use whole wheat flour—just add 2 tbsp extra flour to the mix.
Freshly baked bread keeps for 2-3 days at room temperature, wrapped in a clean kitchen towel. For longer storage, freeze slices in a bag for up to 3 months. To revive, warm in a 350°F oven for 5-10 minutes with a splash of water in a bowl underneath. The butter glaze? Brush it on right after baking while still warm—it’ll melt into a golden crust. Leftovers? Toast them—nothing beats crispy toast from homemade bread.
Why You'll Love This Recipe
- No-Fuss Mixing: I swear by this—just toss the flour, yeast, sugar, and salt in a bowl, then pour in warm water. No measuring cups flying everywhere, no sticky hands from over-kneading. The dough comes together smoother than my attempts at yoga.
- Golden Crust Magic: That little pinch of sugar in the dough? It caramelizes into a crispy, buttery crust while the inside stays soft. Honestly, it’s the kind of bread that makes you pause mid-bite and wonder why you don’t bake this weekly.
- Weeknight Hero: Slice it for toast in the morning, pack it for lunches, or serve it warm with soup when the kids get home. It’s my go-to for when I’m too tired to plan dinner but still want something homemade that feels special.
- Pantry Staple: Five ingredients, zero specialty items, and it costs less than takeout. Between us, I’ve made this at least 12 times this year—because it’s the bread that never lets me down, even when I do.
Step-by-step instructions for fluffy homemade bread
Here's how to make bread that rises high and stays light—no fancy equipment needed.
Activate the Yeast with Warm Water and Sugar
In a small bowl, combine the 1.25 cups warm water (about 110°F) with the 1 tbsp granulated sugar and 2.25 tsp active dry yeast. Let it sit for 5-10 minutes until it becomes frothy. You'll see tiny bubbles forming on top—that's your yeast waking up and doing its job.
This step is crucial because yeast needs warmth and sugar to activate. If it doesn't bubble after 10 minutes, your yeast might be dead, and you'll need to start over. Keep the water warm but not hot—110°F is perfect, and if it's too hot, you'll kill the yeast before it even gets going.
Mix the Dough in a Large Bowl
In a large mixing bowl, whisk together the 3.5 cups all-purpose flour and 1 tsp salt. Create a well in the center and pour in the yeast mixture. Add the 1 whole large egg and 1 tbsp olive oil. Using a wooden spoon or your hands, stir until everything comes together into a shaggy dough.
Once it starts forming a rough ball, sprinkle a little more flour if needed to keep it from sticking to your hands. The dough should be soft but not sticky—if it's too wet, add 1-2 tablespoons of flour to bring it together. This is where the magic begins, and you're building the structure for that airy crumb we're after.
Knead the Dough Until Smooth and Elastic
Turn the dough onto a lightly floured surface and knead it for 8-10 minutes. Press down with the heel of your hand, fold it over, and push it away from you. Rotate the dough and repeat, working in a rhythmic motion. You'll know it's ready when it's smooth, elastic, and springs back slightly when pressed.
Kneading develops gluten, which gives bread its structure and chewiness. If your arms get tired, take a break—this is where patience pays off. The dough should feel firm but still slightly tacky. If it's too dry, add a little water; if too sticky, add a little flour. This step is all about balance.
Let the Dough Rise Until Doubled in Size
Lightly grease a large bowl with a little olive oil, place the dough inside, and cover it with a clean kitchen towel. Let it rise in a warm spot for 30-40 minutes until it has nearly doubled in size. You'll see it puff up and look fluffy—this is the yeast doing its work and creating air pockets.
Don't rush this step. The dough should rise slowly and evenly. If your kitchen is cold, place the bowl near a warm oven (turned off) or on top of a warm water bath to help it rise faster. Once it's puffy and has grown significantly, it's ready for shaping. Poking the dough with a finger should leave a small indent that slowly springs back.
Shape, Proof, and Bake for a Perfect Loaf
Grease a 9x5-inch loaf pan with the 2 tbsp unsalted butter (melted). Transfer the risen dough to the pan and shape it gently by pressing the sides up and tucking any overhanging edges underneath. Cover the pan with the towel again and let it proof for 20-25 minutes until it rises slightly above the pan's rim.
Preheat your oven to 375°F. Bake the bread for 25-30 minutes until it's golden brown on top and sounds hollow when you tap the bottom. If the top browns too quickly, tent it loosely with foil to prevent over-browning. The internal temperature should reach 190-200°F for a perfect bake.
Once done, remove the bread from the pan and let it cool on a wire rack for 10 minutes before slicing. This resting time ensures the crumb stays tender and the bread doesn't fall apart. Serve warm with butter or jam—you've just made bread from scratch in under an hour!
Pro Tips For Making 60 Minute Bread
- Use 110°F Water for Yeast: I learned this the hard way—yeast hates extremes. Too hot and it dies instantly; too cold and it never wakes up. Aim for water that feels warm to your wrist (about 110°F) when mixing with yeast and sugar. If it’s lukewarm, your dough will take twice as long to rise, and you’ll end up with a dense loaf instead of light, airy bread.
- Mix Salt Last, Not First: Salt slows yeast activation, so toss it in after the yeast and sugar have had 5 minutes to foam. I used to add it early and wondered why my dough always took forever to double in size. Sprinkle it in the last 30 seconds of mixing—your yeast will thank you with a faster rise.
- Don’t Over-Knead the Dough: This recipe isn’t asking for a pro-level knead. After mixing, just do 10-12 firm presses with the heel of your hand to develop the gluten. Overworking it makes the bread tough, and honestly? You’ll know it’s enough when the dough starts pulling away from the sides of the bowl. Less elbow grease = better texture.
- Let the Dough Rise Until It’s 50% Larger: I used to eyeball it and pull the bread out too soon—resulting in a sad, flat loaf. Double-check by poking the dough with a finger: if it springs back slowly (not immediately), it’s ready. For this recipe, that’s usually about 45-50 minutes. Patience here guarantees height and that satisfying thwack when you bake it.
Wine and beer pairings for this recipe
Crisp White Wine
A dry Riesling from Germany or Alsace is my go-to pairing for this bread—its bright acidity and citrus notes cut through the buttery richness beautifully. Look for a Kabinett or Spätlese with 8-10% ABV to complement without overpowering. The crispness refreshes your palate between bites of warm bread. 🍷
Honeyed Red Options
For red wine lovers, try a light Pinot Noir from Oregon or Burgundy with subtle fruit flavors. The Pinot Grigio from Alto Adige also works wonderfully—its almond notes pair surprisingly well with the bread's crust. Avoid heavy Cabernets or bold Zinfandels that would clash with the delicate texture.
Beer Pairings
A Belgian witbier like Hoegaarden adds a refreshing contrast with its coriander and citrus undertones. For something heartier, a German pilsner like Warsteiner provides a clean, crisp finish. Avoid overly hoppy IPAs—they'll compete with the bread's natural flavors.
Non-Alcoholic Choices
For a refreshing non-alcoholic option, try sparkling apple cider with a squeeze of lemon. The bubbles and acidity mirror wine pairings perfectly. Iced hibiscus tea with honey is another excellent choice—its floral notes complement the bread's subtle sweetness.
Butter & Jam Pairings
If serving with butter, a honey-glazed loaf pairs beautifully with sharp cheddar cheese or brie. For jam, raspberry or apricot preserves elevate the bread's natural sweetness. The acidity in the jam cuts through the richness, creating a perfect balance. 🍯
Nutrition facts
Frequently asked questions
Can I make this bread without a stand mixer?
This recipe is designed to be made by hand. Just knead the dough for 8-10 minutes on a lightly floured surface using your hands. The rhythmic motion develops gluten naturally—no mixer required. Your arms might get tired, but the result will be just as light and fluffy!
Why did my bread turn out dense instead of fluffy?
Dense bread usually means the yeast didn't activate properly or the dough didn't rise enough. Double-check that your water was 110°F (not hot) and your yeast was fresh. Also, ensure the dough doubled in size during rising—cold kitchens slow this process. If your kitchen is chilly, place the bowl near a warm oven (turned off) to help it rise faster.
Can I substitute whole wheat flour for all-purpose?
Yes, but expect a denser texture. Replace 1 cup of all-purpose flour with whole wheat and add 2 extra tablespoons of flour to compensate for the extra moisture. Whole wheat absorbs liquid differently, so keep an eye on the dough consistency. For best results, use a 50/50 blend of all-purpose and whole wheat.
How do I know when the bread is fully baked?
Your bread is done when it's golden brown on top and sounds hollow when you tap the bottom (like a drum). The internal temperature should reach 190-200°F. If unsure, cut a small slice—it should be fully set with no raw dough inside. A toothpick inserted should come out clean.
Can I make this bread ahead of time?
Yes! Shape and proof the dough, then refrigerate it overnight (covered) before baking. The cold slows the yeast, so add 10-15 extra minutes to baking time. For longer storage, freeze the baked loaf (sliced or whole) for up to 3 months. To revive, warm slices in a 350°F oven for 5-10 minutes with a splash of water in a bowl underneath.