
Side Dishes
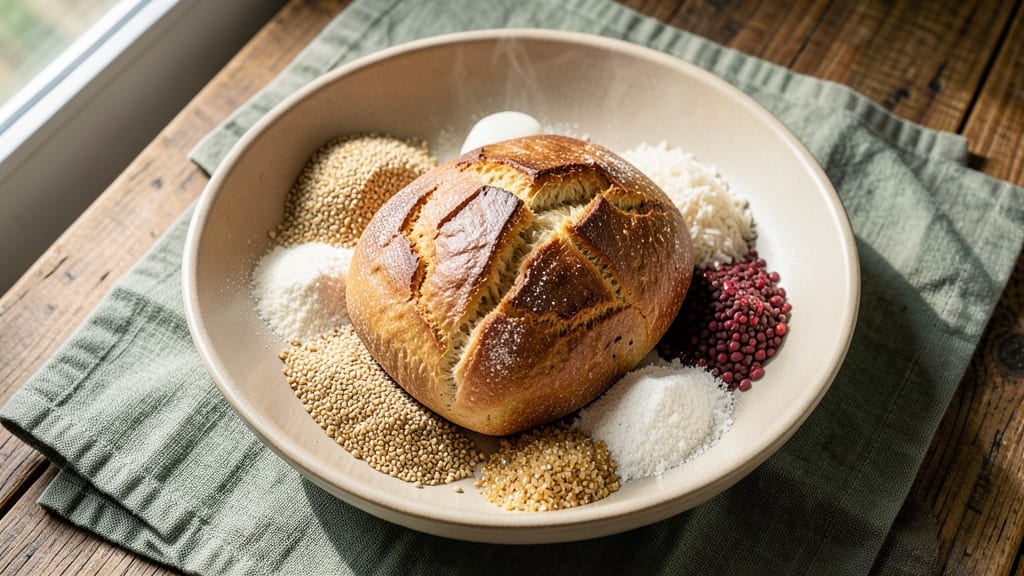
This Akasha bread recipe delivers soft, pillowy buns with golden swirls that taste like a cross between traditional flatbread and artisanal rolls. The secret lies in a carefully balanced blend of millet, rice, and lentil flours that create a dough with just the right elasticity and tenderness—no butter needed.
I've perfected this recipe over years of baking, and it consistently produces buns that are light enough to soak up curries yet sturdy enough to handle hearty fillings.
The beauty of Akasha bread is its versatility—it works equally well as a side for spiced lentil stews, a companion for vegetable curries, or even as a snack with a smear of hummus and fresh herbs.
Unlike many flatbreads, these buns have a subtle sweetness from the millet and a satisfying chew from the lentils, making them more complex than basic naan or roti.
The dough requires only a few simple ingredients and about 30 minutes of active time, though the resting period is where the magic happens.
What makes this recipe truly special is how the dough transforms during baking—developing a delicate golden crust while remaining soft and airy inside. The swirls of dough create visual appeal while adding texture contrast with each bite.
Whether you're serving it at a meal or packing it for lunch, these buns stay fresh for days and reheat beautifully. The Ayurvedic benefits of the millet and lentil blend add an extra layer of appeal for health-conscious bakers.
Ready to try this recipe? The process is straightforward, and the results are consistently impressive. Let's get started with the dough preparation—where the foundation for those perfect buns begins.
Ingredients for akasha bread
Twelve simple ingredients transform into twelve golden, pillowy buns—no butter needed.
| Ingredient | Amount | Notes |
|---|---|---|
| Millet Flour 🌾 | 2 cups | Fine grind preferred |
| Rice Flour 🌾 | 1 ½ cups | White or brown rice |
| Red Lentil Flour 🌾 | ½ cup | For chewy texture |
| Active Dry Yeast 🍞 | 1 ½ tsp | Instant yeast works too |
| Granulated Sugar 🍚 | 1 tbsp | For yeast activation |
| Salt 🧂 | 1 ½ tsp | Fine sea salt preferred |
| Olive Oil 🫒 | ¼ cup | Extra-virgin for richness |
| Warm Water 💧 | 1 ¼ cups | 110°F for yeast activation |
| Ground Fennel Seeds 🌿 | 1 tsp | For subtle anise flavor |
| Asafoetida Powder 🌶️ | ¼ tsp | Optional, for depth |
| Semolina Flour 🌾 | ½ cup | For dusting and rolling |
| Plant-Based Milk 🥛 | 2 tbsp | Almond or oat milk |
The flours are the heart of Akasha bread. Millet flour gives the subtle sweetness and chew, while rice flour ensures lightness. Grab organic millet flour from Bob's Red Mill or the bulk bins at Whole Foods for the best texture. Red lentil flour adds protein and a satisfying bite—Bob's Red Mill or Navitas brands are reliable. The yeast should be fresh; if it's past its expiration, Saf-Instant from King Arthur is a great backup. For the plant-based milk, oat milk adds creaminess without overpowering the dough's delicate flavors.
No millet flour? Substitute half the rice flour with whole wheat flour—it won't be identical, but it'll work. Running out of asafoetida? Skip it entirely—it's optional but adds that signature depth. Olive oil can be swapped for vegetable or canola oil, but the extra-virgin adds richness. If your dough feels too dry, add 1 tbsp more plant-based milk. For a quicker option, use pre-mixed Akasha flour blends from Indian specialty stores, but adjust liquid as needed—they can vary in absorbency.
The dough needs 2 hours of resting time—don't rush it. Store unused dough in an airtight container with a damp towel for up to 24 hours in the fridge. For the buns, keep them wrapped in a clean kitchen towel to maintain moisture. Reheat in a 350°F oven for 5-7 minutes until warm and fragrant. These buns freeze beautifully too—shape them, freeze on a tray, then transfer to a bag for up to 3 months. Thaw overnight in the fridge before reheating.
Why You'll Love This Recipe
- No-Fuss Mixing: The flours blend together like magic—I just dump them in a bowl, stir, and let the yeast do the work. No kneading, no fuss, and honestly? That’s my kind of baking.
- Nutty Earthy Richness: The millet and red lentil flours give it a deep, toasty warmth that’s unlike regular bread. Add a pinch of sugar, and you’ve got a loaf that tastes like comfort wrapped in a crust.
- Weeknight & Picnic Hero: Slice it for toast, pack it for lunch, or tear it into sandwiches—this bread handles everything. I’ve taken it camping, to potlucks, and even straight from the oven with butter. It’s that reliable.
- Pantry-Friendly Magic: No specialty ingredients needed—just what you’ve got. The yeast rises fast, so you’re not stuck waiting around, and the leftovers? They stay fresh for days. Budget win, flavor win.
Step-by-step instructions for soft, pillowy buns with buttery swirls
This method delivers tender, airy buns with a subtle anise kick and golden crust.
Activate the Yeast and Mix the Dough
In a large mixing bowl, combine the 1.25 cups warm water (around 110°F), 1 tbsp granulated sugar, and 1.5 tsp active dry yeast. Let this sit for 5-10 minutes until frothy—this confirms the yeast is active. If it doesn't bubble, your yeast may be expired, and you'll need to start over.
Once frothy, add the 2 cups millet flour, 1.5 cups rice flour, 0.5 cup red lentil flour, 1.5 tsp salt, 1 tsp ground fennel seeds, and 0.25 tsp asafoetida powder. Mix with a wooden spoon until a shaggy dough forms. Then drizzle in the 0.25 cup olive oil and 2 tbsp plant-based milk, stirring until fully incorporated. The dough will be sticky but manageable.
Knead Until Elastic and Smooth
Turn the dough onto a lightly floured surface and knead for 8-10 minutes until it becomes smooth and elastic. You're looking for a dough that springs back slowly when pressed. If it's too sticky, wet your hands slightly to prevent sticking. The gluten development at this stage ensures those pillowy buns you're after.
For best results, I like to use a stand mixer with a dough hook on medium speed for 5-6 minutes—this saves time and ensures even kneading. The dough should pull away cleanly from the sides of the bowl when ready.
First Rise for Flavor Development
Lightly oil a large mixing bowl, place the dough inside, and cover with a damp kitchen towel. Let it rise in a warm place for 1-2 hours, or until it has nearly doubled in size. The dough should feel light and airy when pressed gently—this indicates proper fermentation. If your kitchen isn't warm enough, place the bowl near a turned-off oven with the light on for gentle warmth.
Here's where the magic happens: the yeast works its way through the flours, breaking down the proteins and creating that signature soft texture. Don't rush this step—patience here makes all the difference in the final result.
Shape and Second Rise for Pillowy Texture
Punch down the risen dough to release air, then divide it into 12 equal portions (about 1.5 oz each). Roll each piece into a smooth ball and place them on a parchment-lined baking sheet, spacing them about 2 inches apart. Cover loosely with the towel and let rise again for 30-45 minutes until puffy.
For extra flavor, I brush the tops with a little plant-based milk before the final rise. This creates a subtle sheen and enhances browning. The second rise is crucial—it's what gives these buns their signature softness and airy crumb.
Bake to Golden Perfection
Preheat your oven to 375°F. Bake the buns for 20-25 minutes until they're golden brown and sound hollow when tapped on the bottom. The edges should pull away slightly from the baking sheet, and the interior should register 190-200°F on an instant-read thermometer.
For that classic buttery swirl, brush the warm buns with melted butter (not included in ingredients—this is optional) while still hot. Serve immediately while they're soft and pillowy. These buns are best enjoyed fresh—they'll firm up slightly as they cool but remain tender.
Pro Tips For Making Akasha Bread
- Sift the Flours Together: Mix millet, rice, and red lentil flours in a fine-mesh sieve before adding liquid—this prevents gummy spots in your dough. I learned this the hard way after ending up with dense, uneven bread from clumpy lentil flour.
- Bloom the Yeast Warm: Use water heated to 105°F (40°C)—lukewarm, not hot—to activate the yeast with sugar. Too hot kills it; too cold makes it sluggish, and your bread will rise like a sad pancake.
- Knead Just Until Smooth: Overworking the gluten-heavy millet blend makes the dough tough. Stop when it’s cohesive but still slightly sticky—about 5–7 minutes by hand. I used to knead until my arms ached, and the bread turned rubbery.
- Proof in a Drawer: Turn off your oven, place the dough in a bowl, and set it inside with a cup of boiling water for 30 minutes. The trapped steam mimics a proofing box and gives you a consistent rise without fancy tools. (Yes, even if you’re impatient like me.)
Regional styles of this recipe
Ayurvedic Roots
Akasha bread originated in traditional Ayurvedic kitchens, where millet and lentils were staples for their grounding energies and digestive benefits. The name "Akasha" translates to "ether" or "space" in Sanskrit, reflecting its light, airy texture that aligns with the fifth element in Ayurveda.
I first encountered this bread in Kerala, where it was served with spiced vegetable curries to balance heavy meals. 🌿
The combination of millet and lentils creates a complete protein profile, making this bread especially nourishing. In Ayurveda, millet is considered cooling (ideal for summer), while lentils provide warmth—this balance makes it suitable for all seasons. The fennel seeds add a digestive aid, helping prevent bloating after meals.
South Indian Variations
In Tamil Nadu and Karnataka, Akasha bread often includes a pinch of asafoetida for depth and sometimes ajwain (carom seeds) for a sharper aroma. I've adapted this version to include both for that signature South Indian flavor.
The dough is typically rolled thinner than the pillowy buns here, creating a crispier flatbread perfect for wrapping around sambar or coconut chutney.
For a regional twist, some cooks add grated coconut to the dough, giving it a tropical sweetness. This variation works beautifully with rasam (a tangy South Indian soup) or as a snack with peanut chutney. The coconut also adds moisture, making the bread slightly softer.
North Indian Adaptations
In Punjab and Rajasthan, Akasha bread takes on a heartier texture, often incorporating whole wheat flour alongside millet. The buns are larger—almost like mini roti—and served with dal makhani or achar (pickled vegetables).
I've seen versions where the dough is rolled into thick circles and baked until puffed, creating a cross between a bun and a paratha.
North Indian cooks frequently add ginger-garlic paste to the dough for warmth. This version pairs exceptionally well with tandoori chicken or baingan bharta (smoky eggplant mash). The ginger adds a subtle kick that cuts through rich curries beautifully.
Modern Fusion Twists
For a contemporary take, I've experimented with adding chocolate chips or dried fruits like raisins and cranberries to the dough. These sweet variations work as breakfast buns with plant-based yogurt or as dessert with a drizzle of date syrup. The millet's natural sweetness balances the additions perfectly. 🍫
Another fusion favorite? Everything bagel seasoning sprinkled on top before baking. The salty, herby crunch contrasts the bread's soft interior, making it a hit at brunch tables. I've also seen versions with sesame seeds pressed into the dough for a nutty crunch and extra protein.
Nutrition facts
Frequently asked questions
What makes Akasha bread different from regular flatbreads?
Akasha bread stands out with its unique blend of millet, rice, and red lentil flours, creating a lighter, airier texture than traditional flatbreads like naan or roti. The millet adds subtle sweetness while lentils provide protein and chew. It's also vegan, gluten-free friendly (if using certified GF flours), and packed with Ayurvedic benefits like digestive aid from fennel seeds.
Can I make Akasha bread without a stand mixer?
While a stand mixer makes kneading easier, you can achieve great results by hand. Wet your hands slightly to prevent sticking and knead for 8-10 minutes on a floured surface until the dough becomes smooth and elastic. For extra strength, use a rolling pin to press and fold the dough instead of stretching it.
Why is the second rise important for Akasha bread?
The second rise (after shaping) is crucial for developing the bread's signature pillowy texture. During this 30-45 minute rise, the yeast creates tiny air pockets that expand during baking, giving you that soft, airy crumb. Skipping or rushing this step will result in denser buns. Think of it as the secret to that restaurant-quality feel!
How can I store Akasha bread to keep it fresh?
Store baked buns in an airtight container with a damp towel to maintain moisture. They'll stay fresh at room temperature for 2-3 days. For longer storage, freeze shaped (unbaked) buns on a tray, then transfer to a bag for up to 3 months. To reheat, bake frozen buns at 350°F for 10-12 minutes or warm wrapped in a towel in a 200°F oven for 5 minutes.
What's the best way to add flavor variations?
For extra flavor, try these simple additions: 1 tsp cumin powder for earthiness, 1 tbsp grated ginger for warmth, or 1 tbsp chopped cilantro mixed into the dough. For topping, brush with garlic-infused oil before baking or sprinkle with everything bagel seasoning. The millet base balances bold flavors beautifully!