
Side Dishes
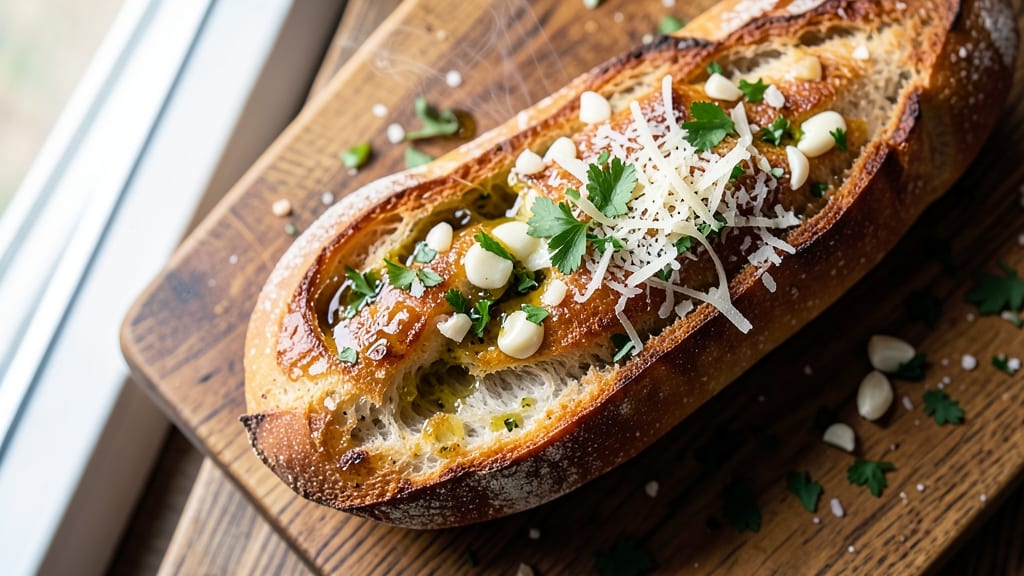
This awesome garlic bread recipe transforms simple ingredients into a golden, crispy masterpiece with pockets of garlicky richness. The secret lies in a foolproof method that ensures every slice delivers that perfect balance of buttery crust and tender, flavorful interior.
I've perfected this technique over years of testing, and it never fails to impress—whether you're serving it as an appetizer or a side dish.
The process is straightforward: start with a good-quality baguette, slathered with a generous mix of melted butter and minced garlic, then toasted until golden and crisp. The key is patience—letting the garlic infuse the butter thoroughly before spreading it ensures maximum flavor in every bite.
Fresh herbs like parsley add a bright finish, while a sprinkle of parmesan cheese takes it to the next level.
What you'll end up with is garlic bread that's crispy on the outside, soft and buttery inside, and packed with garlicky flavor that lingers on your taste buds. The aroma alone will have everyone gathering around the table, and the first bite will have them asking for seconds.
This isn't just garlic bread—it's a showstopper that elevates any meal.
Use this recipe for game day, dinner parties, or even as a simple weeknight treat. The beauty of it is in its versatility—you can make it ahead and reheat it when needed, or customize it with different herbs or cheeses to suit your taste.
Let's get started on creating the perfect loaf!
Ingredients for awesome garlic bread
Nine simple ingredients for golden, crispy garlic bread that steals the show every time.
| Ingredient | Amount | Notes |
|---|---|---|
| Baguette 🍞 | 1 whole | Freshly baked, crusty kind |
| Unsalted Butter 🧈 | ½ cup | Cold, cut into cubes |
| Garlic Cloves 🧄 | 6 cloves | Fresh, minced finely |
| Fresh Parsley 🌿 | ¼ cup | Chopped finely for garnish |
| Parmesan Cheese 🧀 | ¼ cup | Freshly grated from block |
| Olive Oil 🫒 | 1 tbsp | For brushing bread |
| Sea Salt 🧂 | ½ tsp | Fine grain preferred |
| Black Pepper 🌶️ | ¼ tsp | Freshly ground |
| Dried Oregano 🍃 | ½ tsp | Optional for extra flavor |
The baguette makes all the difference—French-style loaves from Trader Joe's or Whole Foods have that perfect chewy crust. Skip the pre-sliced stuff; you want the crust intact for maximum crispiness. For the garlic, fresh is non-negotiable—jarred minced garlic has no flavor. I always grab extra cloves: half for the butter, half to toss in the oven at the end. The butter should be cold when you start—this ensures it doesn't melt into a greasy mess while you're prepping. If your baguette is dry, brush it with olive oil before baking for extra moisture.
No fresh parsley? Dried works in a pinch—just use half the amount. Running low on Parmesan? Pecorino Romano is a great swap, or skip it entirely if you're keeping this dairy-free. Want more garlic flavor? Add an extra 2-3 cloves to the butter mix. The dried oregano is totally optional, but it adds that Italian touch. For the sea salt, Diamond Crystal kosher salt is my go-to—it dissolves perfectly. And if you're feeling fancy, toss a few toasted pine nuts on top before serving for crunch.
This bread stays fresh for 2 days in an airtight container, but it's best served fresh. For a quick reheat, wrap slices in foil and warm in a 350°F oven for 5 minutes. The flavor actually improves overnight—the garlic really soaks in. Make a double batch and freeze half for lazy days. Just thaw at room temp before reheating. Pro tip: Use a pizza stone or baking sheet for that perfect crispy crust—no sad, soggy garlic bread here.
Why You'll Love This Recipe
- Here’s what sold me: that first bite of toasted crust with the soft, buttery center packed with minced garlic and fresh parsley. The Parmesan? It’s the secret weapon—melty, salty, and nutty all at once. Honestly, I’ll take this over store-bought any day.
- Five-Ingredient Magic: I swear by this—just butter, garlic, bread, parsley, and cheese. That’s it. No fancy techniques, no extra shopping trips. The baguette soaks up the garlic butter while the oven does all the work, and suddenly you’ve got something that tastes like it took hours.
- Crispy-Garlicky Bliss: Here’s what sold me: that first bite of toasted crust with the soft, buttery center packed with minced garlic and fresh parsley. The Parmesan? It’s the secret weapon—melty, salty, and nutty all at once. Honestly, I’ll take this over store-bought any day.
- Weeknight Crowd-Pleaser: Between us, this is my go-to for movie nights, lazy Sundays, or when friends drop by unannounced. It’s the kind of thing everyone reaches for first—even my picky-eater brother. And the best part? It disappears faster than I can say “second round.”
Step-by-step instructions for buttery garlic bread
Here's how to make garlic bread that's crispy on the outside and packed with flavor inside.
Prep the Baguette for Maximum Flavor
Start by slicing the whole baguette lengthwise, cutting about halfway through so you create a long slit down the middle. This allows the butter and garlic to seep into every crevice. I like to leave the crust intact on the outside—it adds that perfect crunch that everyone loves.
Once you've made the cut, gently open the baguette like a book, creating two long halves. You'll want to keep them connected at the ends so they stay in one piece. Place the opened baguette on a baking sheet lined with parchment paper to catch any butter drippings.
Create the Ultimate Garlic Butter Mixture
In a small bowl, combine the cold, cubed unsalted butter, minced garlic cloves, sea salt, black pepper, and dried oregano. I like to use my fingers to work the mixture until it's fully incorporated—this helps distribute the garlic flavor evenly. The butter should soften slightly but still hold its shape.
Here's the thing—don't skip the oregano if you're using it. It adds a subtle earthiness that complements the garlic perfectly. If you're feeling fancy, you can even add a pinch of red pepper flakes for a little kick. Just make sure to save some of this mixture for spreading on top later.
Stuff and Seal the Baguette
Now it's time to stuff the baguette with the garlic butter mixture. Spread about half of the mixture evenly over the cut sides of the baguette, pressing it into the crevices. Then, close the baguette back up, pressing gently but firmly to seal in all that flavor.
Once it's closed, spread the remaining garlic butter mixture over the outside of the baguette, making sure to get it into every nook and cranny. This is where the magic happens—the butter will melt and create that golden, crispy crust we're all after.
Bake to Golden Perfection
Preheat your oven to 375°F. While it's heating, brush the outside of the baguette with the olive oil using a pastry brush. This helps create that beautiful, glossy finish. Place the baguette on the baking sheet and bake for 10-12 minutes until it's golden brown and crispy.
You'll know it's done when the edges are golden and the baguette sounds hollow when you tap it gently. Be careful not to overbake—you want it to stay crispy, not dry. If it starts to brown too quickly, you can tent it loosely with aluminum foil for the last couple of minutes.
Garnish and Serve Immediately
As soon as you take the garlic bread out of the oven, sprinkle the freshly grated parmesan cheese evenly over the top. The cheese will melt slightly from the residual heat, adding an extra layer of flavor. Then, sprinkle the finely chopped fresh parsley over the cheese for a pop of color and freshness.
Let it rest for just a minute or two—this helps everything set and makes it easier to slice. Serve it warm and watch as everyone reaches for seconds. This garlic bread is the perfect side dish, appetizer, or even a main course when paired with a simple salad or soup.
Pro Tips For Making Awesome Garlic Bread
- Slice the Baguette Fresh: Buy it the same day—even pre-sliced loaves lose crispness fast. If you’re working ahead, wrap tightly in parchment and foil, but toast it within 24 hours or the crust turns sad and limp.
- Mince Garlic Like You Mean It: Skip the press—it bruises the cloves and makes them bitter. Use a sharp knife and chop finely, almost into a paste, so every bite gets that garlicky punch without overwhelming chunks.
- Butter It Generously: Don’t skimp—this isn’t a diet dish. Use at least ½ cup softened butter for a full baguette, spread it thickly, and let it soak in before toasting. Thin layers = dry bread.
- Toast in Two Batches: Crowding the pan steams the bread instead of browning it. Toast half first, then flip and add the rest—high heat and a little patience guarantee crispy, golden edges every time.
Perfect pairings for this dish
Classic Pairings
Serve this garlic bread alongside creamy tomato basil soup—the warm, garlicky notes complement the acidity perfectly. I love pairing it with baked brie for a decadent appetizer: slice the bread into small pieces, top with brie, and broil until bubbly. 🍲
Wine Recommendations
A crisp Sauvignon Blanc from New Zealand cuts through the richness beautifully. The citrus notes refresh your palate between buttery bites. For red lovers, a Pinot Noir with its bright acidity and red fruit flavors works wonders. Avoid heavy, oaky wines—they’ll overpower the delicate garlic butter.
Beer Pairings
Light Italian lagers like Peroni or Moretti are ideal—they’re crisp and clean, letting the garlic bread shine. For craft beer fans, a Belgian witbier with its peppery, citrusy profile adds an interesting contrast. Skip heavy IPAs or stouts—they’ll compete with the bread’s flavor instead of complementing it. 🍺
Unexpected Pairings
Try pairing with spicy Asian-inspired dishes like sweet chili chicken—the heat balances the buttery garlic perfectly. For a vegetarian option, roasted eggplant with tahini drizzle creates a stunning contrast. The key is balancing rich, creamy flavors with something bright or acidic to keep each bite interesting.
Dessert Pairings
End the meal with dark chocolate-dipped strawberries—the bitterness contrasts the garlic bread’s richness. For a lighter option, lemon sorbet cleanses the palate beautifully. Avoid overly sweet desserts—they’ll clash with the savory garlic butter. A small espresso after dessert enhances the garlic’s aromatic notes. ☕
Make-Ahead Pairings
Prep the garlic bread ahead and pair it with charcuterie boards for easy entertaining. Include prosciutto, aged cheddar, and cornichons for a well-rounded spread. For game day, pair with wing sauce—the bread soaks up the sauce perfectly.
The beauty of this pairing is that everything can be prepped in advance, making it stress-free. 🏈
Nutrition facts
Frequently asked questions
Can I use any bread for this garlic bread recipe?
A baguette is ideal for that perfect crispy crust, but you can adapt this recipe! Try a French bread or ciabatta for extra texture. Avoid soft breads like sandwich loaves—they won't crisp up properly. For a twist, use a baguette-style sourdough or even garlic bread rolls for individual portions.
How do I make this garlic bread ahead of time?
Assemble the garlic butter mixture and stuff the bread up to 2 days ahead, then refrigerate. Bake straight from the fridge at 375°F for 15-18 minutes (add 3-5 extra minutes). For longer storage, freeze the assembled bread (unbaked) for up to 1 month. Thaw overnight in the fridge before baking. The flavor actually improves overnight!
Why is my garlic bread soggy instead of crispy?
Soggy garlic bread usually means one of three things: overstuffing with butter, underbaking, or baking on a cold pan. Use half the butter mixture inside and spread the rest on top. Bake until golden (10-12 minutes) and always use a preheated oven. For extra crispiness, bake on a pizza stone or baking sheet with parchment paper.
Can I make this gluten-free or dairy-free?
For gluten-free, use a gluten-free baguette (like Schär) and dairy-free butter. For dairy-free, swap butter for olive oil or vegan butter (like Miyoko's). The texture will be slightly different, but the garlicky flavor stays intact. Just brush extra oil on the bread for crispiness.
How do I reheat leftover garlic bread?
Wrap slices in foil and warm at 350°F for 5-7 minutes to restore crispiness. For a quick fix, toast in a toaster oven for 2-3 minutes (watch closely to avoid burning). Avoid microwaving—it makes the bread rubbery. Pro tip: Reheat in batches to keep the bread crispy, not soggy.