
Side Dishes
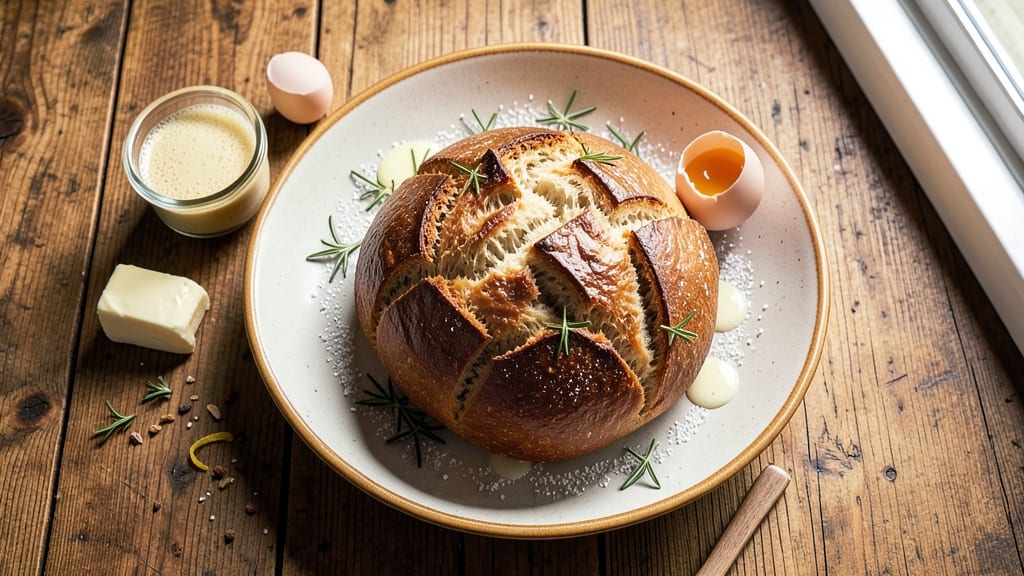
Transforming simple dough into this artistic bread recipe is where baking meets artistry. This stunning swirled marble loaf delivers a crusty exterior with a delicate, marbled interior that looks as impressive as it tastes—perfect for elevating any table.
The key lies in precise dough layering and gentle shaping techniques that create those signature ribbons without tearing.
What sets this recipe apart is the foolproof marble effect, achieved by carefully rolling and folding colored dough into a cohesive block before shaping. The high-gluten flour ensures a satisfying crunch, while the slow bake develops deep, nutty flavors.
Even beginners can master the technique with clear, step-by-step guidance.
Imagine slicing into a loaf with swirling patterns that reveal contrasting colors—each bite offers a mix of crispy crust and tender crumb. This bread isn’t just functional; it’s a centerpiece that transforms ordinary meals into special occasions.
The beauty lies in the process, but the reward is a loaf that doubles as edible art.
Whether you’re baking for a holiday gathering or simply want to impress, this recipe delivers restaurant-quality presentation with minimal effort. The secret? Patience in the shaping and confidence in the baking. Let’s create something extraordinary together.
Ingredients for artistic bread
Four cups flour plus vibrant colors create this restaurant-quality marble bread masterpiece.
| Ingredient | Amount | Notes |
|---|---|---|
| High-Gluten Flour 🌾 | 4 cups | Bread flour preferred for structure |
| Active Dry Yeast 🍞 | ¼ oz | Or 2 1/4 tsp (7g) |
| Granulated Sugar 🍚 | ½ cup | For yeast activation |
| Unsalted Butter 🧈 | ½ cup | Cold, cubed for dough |
| Large Eggs 🥚 | 2 whole | Room temperature |
| Whole Milk 🥛 | 1 cup | Warmed to 110°F |
| Diamond Crystal Kosher Salt 🧂 | 1 ½ tsp | Adjust to taste |
| Red Food Coloring Gel 🎨 | 1 tsp | For vibrant marble effect |
| Yellow Food Coloring Gel 🎨 | 1 tsp | For vibrant marble effect |
| Cornmeal 🌽 | ½ cup | For dusting dough |
| Water 💧 | ½ cup | Room temperature |
| Olive Oil 🫒 | 1 tbsp | For final brushing |
The high-gluten flour is non-negotiable here—King Arthur or Caputo are my go-tos for that perfect crunch and chew. Bulk bins at Whole Foods often carry excellent options if you prefer to measure yourself. Active dry yeast must be fresh: test it by mixing 1 tsp with warm water and 1 tsp sugar—it should foam within 10 minutes. For the butter, Plugrá or Land O'Lakes unsalted work beautifully, but avoid salted at all costs. The food coloring gels (like Wilmington Gel Colors) create the most vibrant swirls without altering the dough's structure—liquid dyes can make the bread gummy.
No red or yellow gel? Turmeric for yellow and beet juice for red work in a pinch, though the colors won't be as vivid. Substituting bread flour? All-purpose plus 2 tbsp vital wheat gluten mimics high-gluten performance. The milk can be any variety, but whole milk yields richer flavor. Eggs should be large—medium eggs will affect the dough's structure slightly. For a dairy-free version, replace the milk with unsweetened almond milk**> and the butter with vegan butter. The water must be room temperature—cold water shocks the yeast.
Store the dry ingredients (flour, yeast, sugar, salt) in airtight containers for up to 6 months. Once mixed, the dough keeps for 24 hours in the fridge wrapped tightly in plastic. For longer storage, freeze shaped loaves (unbaked) for up to 3 months. Thaw overnight in the fridge before baking. The finished loaf stays fresh for 3 days at room temperature wrapped in a clean kitchen towel. For reheating, wrap cooled slices in foil and warm at 350°F for 5 minutes—restores that bakery-fresh crunch.
Why You'll Love This Recipe
- No-Knead Magic: I swear by this recipe—just mix, shape, and let the high-gluten flour do the heavy lifting. No stand mixer, no arm workout, just a bowl and your hands.
- Buttery Rich Crust: That egg wash? Life-changing. The butter in the dough gives it a melt-in-your-mouth softness, but the crust? Crispy enough to hold a charred baguette vibe—no fancy bakery needed.
- Weeknight or Showstopper: Same dough, endless options. Slather it with garlic butter for dinner, shape it into free-form loaves for a holiday table, or cut it into dinner rolls. Honestly, I’ve even used the scraps for croutons.
- Leftovers That Don’t Suck: This bread stays fresh for days, and if you’re like me, you’ll want to eat it all. But if you’re smart, you’ll freeze slices—just toast them straight from frozen, and they taste like you just baked them. Budget win.
Step-by-step instructions for swirled marble dough with crusty crunch
Transform simple ingredients into a visually stunning loaf with this precise method.
Activate the Yeast and Prepare the Dough Base
In a small bowl, combine the 0.5 cup granulated sugar, 1 cup warm whole milk (110°F), and 0.25 oz active dry yeast. Let this mixture sit for 5-10 minutes until it becomes frothy and bubbly—this confirms the yeast is active. If it doesn't bubble, your yeast may be dead, and you'll need to start over.
In a large mixing bowl, whisk together the 4 cups high-gluten flour and 1.5 tsp diamond crystal kosher salt. Create a well in the center and pour in the yeast mixture along with the 2 whole large eggs and 0.5 cup cold cubed unsalted butter. Using a wooden spoon or dough whisk, gently combine until a shaggy dough forms. Avoid overmixing at this stage—just until the ingredients come together.
Develop the Dough and Divide for Coloring
Turn the dough onto a lightly floured surface and knead for 8-10 minutes until smooth and elastic. The dough should spring back when poked and feel slightly tacky but not sticky. If it's too dry, add 1 tbsp water at a time; if too sticky, add 1 tbsp flour. Shape into a ball, place back in the bowl, cover with a damp towel, and let rise in a warm place (75-80°F) for 1-1.5 hours or until doubled in size.
Once risen, divide the dough into two equal portions. In one portion, add 1 tsp red food coloring gel and knead until evenly distributed. In the other, add 1 tsp yellow food coloring gel and knead similarly. Let both colored doughs rest for 10 minutes while you prepare your workspace.
Create the Marble Swirl Effect
Roll out one colored dough on a floured surface into a 12x8-inch rectangle. Place the second colored dough on top and roll both together into a 16x10-inch rectangle, sealing the edges tightly. Fold the dough into thirds like a letter, then turn it 90 degrees and fold into thirds again. This creates a layered effect that will develop beautiful swirls during baking.
Shape the dough into a 12-inch log, taper the ends slightly, and place seam-side down on a parchment-lined baking sheet. Cover with a damp towel and let rise for 45-60 minutes until the dough has expanded by about 50%. The swirls should become more pronounced as it rises.
Shape and Proof for Final Rise
Transfer the dough to a piece of parchment paper dusted with 0.5 cup cornmeal. Shape into an oval loaf by gently stretching and folding the ends toward the center. Place on a second parchment-lined baking sheet and cover loosely with plastic wrap. Let proof at room temperature (70-72°F) for 1-1.5 hours until the dough feels light and springs back slowly when poked.
Preheat your oven to 375°F with a baking stone or inverted baking sheet inside for 30 minutes. Brush the loaf with 1 tbsp olive oil and score the top with a sharp razor blade in a decorative pattern—this allows steam to escape and creates an appealing crust.
Bake to Golden Perfection
Transfer the loaf to the preheated oven and bake for 30-35 minutes until the internal temperature reaches 190-195°F and the crust is deep golden brown with crispy edges. For best results, bake on the lower third of the oven where heat is most even.
Immediately after baking, transfer the loaf to a wire rack to cool completely. The marble swirls will become more vibrant as the bread cools, revealing the artistic pattern beneath the crust. Slice when fully cooled for clean, even pieces that showcase the colorful interior.
Pro Tips For Making Artistic Bread
- WEIGH YOUR FLOUR: High-gluten flour is finicky—scooping it from the bag packs in too much air, making your dough dry and tough. Use a kitchen scale for precision; aim for 10% less than the recipe’s volume measurement (yes, even if it feels counterintuitive). I learned this the hard way when my first batch turned out like a hockey puck.
- SOAK THE YEAST DRY: Skip the warm water trick—active dry yeast blooms faster and more reliably in a slightly cooler mix (around 90°F/32°C). Stir in the sugar first, then add yeast, and let it sit for exactly 5 minutes before mixing with flour. Overproofing here ruins your whole day.
- CHILL THE DOUGH: After the first rise, pop your dough in the fridge for at least 12 hours. The cold slows fermentation, deepens flavor, and makes shaping easier—no more sticky, frustrating globs. I was skeptical until I tried it; now it’s non-negotiable.
- SCORE DEEPER: Use a razor blade (cleaned, obviously) to slash the dough almost to the pan—about ¼ inch deep. This isn’t just for looks; it directs the oven spring so your bread rises evenly. A dull knife leaves weak cuts that tear open mid-bake.
Common mistakes when making this dish
Over-Kneading the Dough
This is my biggest pet peeve when I see beginners tackle artistic bread—over-kneading ruins the delicate structure needed for those perfect swirls. Once you've kneaded for 8-10 minutes and the dough springs back when poked, stop immediately.
Overworking develops too much gluten, making the dough tough and dense rather than tender. I've seen loaves that looked perfect going into the oven but turned out like dense hockey pucks after baking. 💫
Uneven Coloring
The marble effect relies on vibrant, even color distribution, so don't just eyeball those 1 tsp food coloring gels. Mix them thoroughly into each dough portion until no streaks remain—this takes about 2-3 minutes of kneading per color.
I once made a loaf where the red was concentrated in one spot, creating an ugly splotch instead of elegant swirls. For best results, use gel colors like Wilmington Gel Colors which blend more evenly than liquid dyes.
Skipping the Rest Period
After dividing and coloring the dough, it's tempting to rush straight to rolling, but that 10-minute rest> is crucial. Without it, the colored doughs won't relax enough, making them more likely to tear when you try to create those delicate swirls.
I learned this the hard way when my first attempt turned into a lopsided mess. Think of it like stretching before a workout—your dough needs time to become pliable.
Improper Folding Technique
The letter-fold method creates those beautiful swirls, but many people either don't fold enough or fold too tightly. You want three folds total> (two sets of thirds) to build layers without compressing the dough too much.
I see people make just one fold or squeeze too hard, which flattens the layers and prevents proper swirling during baking. Practice on a small dough ball first if you're unsure—it makes all the difference in the final presentation.
Inconsistent Proofing Conditions
Proofing is where most artistic bread fails, and temperature control is key. Your kitchen should be between 70-72°F for final proofing—any colder and the dough won't rise properly; any warmer and it might overproof.
I've had loaves that looked perfect after shaping but collapsed in the oven because they proofed too long. Use an oven with light on or a proofing box if your kitchen runs cold. The dough should feel light and spring back slowly when poked—about 50% larger> than when shaped.
Scoring Too Late
Scoring should happen right before baking when the dough is fully proofed and just before going into the oven. I've seen people score too early, which can cause the dough to relax and lose its shape before baking.
Use a sharp razor blade> and make confident cuts—hesitation creates jagged edges. The score should be about ¼ inch deep> and follow the natural contours of your loaf.
This isn't just decorative; it allows steam to escape, creating that beautiful oven spring and crisp crust we all love. 🔥
Nutrition facts
Frequently asked questions
Can I make this artistic bread without food coloring?
For a natural look, use turmeric (1 tsp) for yellow and beet juice (2 tbsp) for red. Mix the beet juice into a small amount of water first to prevent over-moistening the dough. The colors will be more subtle but still create beautiful swirls.
How do I store leftover artistic bread?
Wrap cooled slices in a clean kitchen towel and store in an airtight container for 3 days at room temperature. For longer storage, freeze slices for upstrong> 3 months. To reheat, wrap individual slices in foil and warm at 350°F for 5 minutes—this restores the crispy crust perfectly.
What's the best way to slice this bread to show off the swirls?
Use a serrated bread knife and cut at a 45-degree angle for dramatic presentation. Slice the loaf in half lengthwise first, then make horizontal cuts about ½-inch thick. For even cleaner slices, chill the bread for 30 minutes before cutting.
Can I make this recipe gluten-free?
This recipe requires high-gluten flour for the perfect texture, but you can adapt it with a 1:1 gluten-free bread flour blend plus ½ tsp xanthan gum. Expect a slightly denser crumb, and proofing times may increase. The swirl effect will still work, though the crust won't be as crisp.
Why did my dough tear when I was folding it?
This usually happens when the dough isn't rested long enough after coloring. Always let colored doughs rest for 10 minutes before rolling. If it tears, gently press the edges together and continue shaping—don't overwork it. For extra help, dust your surface with extra cornmeal to reduce sticking.