
Side Dishes
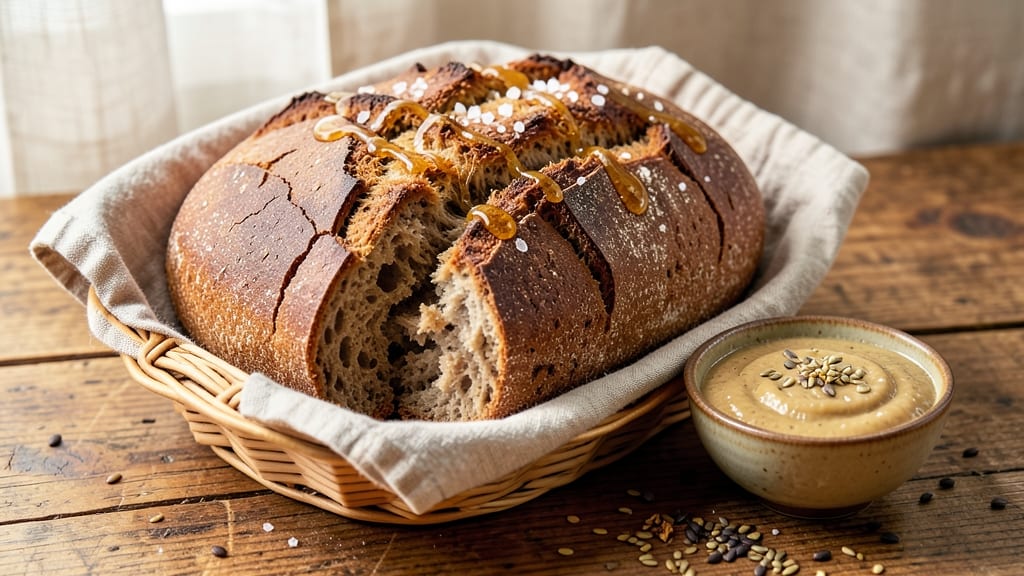
This authentic German rye bread recipe brings the heart of Bavaria to your kitchen with its signature dense crumb and dark, malty crust. 🌾 The secret lies in a traditional sour starter and precise hydration—no shortcuts here, just time-honored technique that transforms simple ingredients into something extraordinary.
I’ve baked this version countless times, perfecting the balance between tangy sourness and subtle sweetness that defines German rye.
The beauty of this recipe is in its simplicity once you master the basics: a robust starter, proper kneading, and a slow bake that develops deep flavor. Unlike lighter breads, rye relies on patience—its dense texture comes from high hydration and a long fermentation, which builds complexity.
The crust should be dark and crispy, while the interior remains tender with just the right chew.
What makes this bread truly special is its versatility—serve it fresh with butter, toast it for breakfast, or use it as the foundation for open-faced sandwiches. The flavor profile is rich and earthy, with a subtle tang that pairs perfectly with hearty German dishes or even simple jam.
Every slice tells a story of tradition and craftsmanship.
Ready to bake? This recipe delivers restaurant-quality results at home, with tips to troubleshoot common pitfalls like overproofing or a pale crust. Whether you’re a seasoned baker or new to rye, the process is rewarding—and the aroma alone will have your kitchen smelling like a German bakery.
Ingredients for authentic german rye bread
Traditional German rye bread starts with these time-honored ingredients for rich, tangy flavor and dense texture.
| Ingredient | Amount | Notes |
|---|---|---|
| Rye Flour 🌾 | 3 cups | Dark rye flour preferred |
| All-Purpose Flour 🌾 | 1 cup | For lighter texture balance |
| Active Dry Yeast 🍞 | ¼ oz | Or 2.25 tsp |
| Sour Starter 🥣 | 1 cup | Traditional rye starter (see notes) |
| Warm Water 💧 | 2 ½ cups | 105-110°F for optimal yeast activation |
| Dark Brown Sugar 🍯 | 1 tbsp | Enhances malty flavor |
| Salt 🧂 | 2 tsp | Diamond Crystal preferred |
| Honey 🍯 | 1 tbsp | For subtle sweetness |
| Melted Butter 🧈 | ¼ cup | Unsalted, cooled slightly |
| Molasses 🍯 | 1 tbsp | For depth of flavor |
| Sesame Seeds 🌰 | 1 tbsp | For traditional topping |
| Coarse Cornmeal 🌽 | ½ cup | For dusting baking sheet |
The rye flour is non-negotiable here—dark rye flour gives that signature malty depth. King Arthur or Bob's Red Mill are reliable brands, but any German-style rye flour works. For the sour starter, you can buy a pre-made rye sourdough starter from specialty stores or make your own by fermenting rye flour and water for 5-7 days. The yeast should be fresh, not expired, and the warm water temperature is crucial—too hot kills it, too cold slows activation. If you're unsure about your starter's strength, add an extra 0.25 tsp yeast for safety.
No dark rye flour? Substitute with pumpernickel flour or half dark rye, half whole wheat—though the flavor won't be identical. Running out of honey? Maple syrup works in a pinch, but reduce to 1 tsp since it's sweeter. For a gluten-free version, use a 1:1 gluten-free flour blend but expect a denser, less chewy result. The molasses adds complexity—unsulphured is best—and if you can't find it, a mix of brown sugar and a splash of vinegar mimics the tang. Sesame seeds are traditional, but poppy seeds or flaxseeds work too if that's what you have.
The sour starter keeps in the fridge for up to 2 weeks—feed it weekly with equal parts flour and water. Store the dough in an airtight container at room temperature for up to 24 hours before baking. For best results, bake within 4 hours of shaping to preserve freshness. Leftovers? Toast slices for breakfast—they keep for 3-4 days wrapped in a cloth, or freeze for up to 3 months. The crust stays crisp for about 2 hours after baking, so slice and serve promptly if you're impatient like me.
Why You'll Love This Recipe
- No Yeast Fuss: I swear by this—just toss in the yeast, a splash of warm water, and let the sour starter do the heavy lifting. No kneading, no waiting hours; the dough comes together faster than my morning coffee.
- Earthy Crust Magic: That rye flour? It’s the star—deep, nutty, with just a hint of tang from the starter. Toast it, and the crust turns into this irresistible, caramelized crunch that makes every bite feel like a little German café escape.
- Weeknight Workhorse: Serve it fresh with butter for breakfast, pack slices for lunch, or use it to soak up gravy at dinner. It’s my go-to for sandwiches, charcuterie boards, or even a quick open-faced meal when I’m too tired to fuss.
- Budget-Friendly Staple: Rye flour is cheaper than fancy bread mixes, and a single batch lasts me days. Freeze extras for when I’m too lazy to bake—just thaw and enjoy. Honestly, it’s the kind of bread that makes grocery bills feel a little lighter.
Step-by-step instructions for authentic German rye bread
This method delivers the signature dense crumb, malty flavor, and crisp crust of traditional German Roggenbrot.
👨🍳 Step 1: Mix the Fermented Dough
In a large mixing bowl, combine the 3 cups rye flour and 1 cup all-purpose flour. Create a well in the center and add the 0.25 oz active dry yeast, 1 cup sour starter, 2.5 cups warm water (between 105-110°F), 1 tbsp dark brown sugar, 2 tsp salt, 1 tbsp honey, and 1 tbsp molasses. The warm water should activate the yeast immediately—you'll see small bubbles forming.
Using a wooden spoon or dough whisk, mix vigorously for 5-7 minutes until the dough reaches a thick, sticky batter consistency. The rye flour will create a dense, heavy texture that's characteristic of German rye bread. The dough should cling to the spoon but still be workable. If it's too thick, add 1 tablespoon warm water at a time until you reach the right consistency.
🥘 Step 2: Incorporate the Butter and Rest
Remove the bowl from the heat (if you were using a stand mixer) and let the dough cool slightly to 75-80°F. Then, gradually drizzle in the 0.25 cup melted butter while mixing on low speed. The butter will help create a lighter texture while maintaining the bread's signature density. Mix just until fully combined—overmixing develops gluten and makes the bread too light.
Cover the bowl with a damp kitchen towel and let the dough rest at room temperature for 12-16 hours. This long fermentation is crucial for developing the bread's complex flavors and proper texture. The dough will rise slightly and develop a tangy aroma from the sour starter. I like to place the bowl in a slightly warm spot in my kitchen—this encourages better fermentation without overheating the yeast.
🔥 Step 3: Shape and Proof the Dough
After fermentation, the dough will have risen and developed a slightly sticky surface. Lightly dust your work surface with 0.5 cup coarse cornmeal and transfer the dough. Using wet hands, gently shape the dough into a 10-inch round loaf by pulling the edges toward the center. The dough should be smooth but still slightly tacky—this is normal for rye bread.
Place the shaped loaf on a parchment-lined baking sheet, seam-side up. Cover loosely with plastic wrap and let it proof at room temperature for 2-3 hours, or until it has risen by about 50%. You'll know it's ready when the dough springs back slowly when pressed gently with a finger. The surface should look slightly domed and feel firm to the touch.
🔪 Step 4: Score and Bake for Crusty Perfection
Preheat your oven to 375°F with a Dutch oven inside for 30 minutes. This creates a steam environment that's essential for the bread's signature crust. Remove the Dutch oven and carefully transfer the loaf to it. Using a sharp razor blade or serrated knife, score the top of the loaf in a crosshatch pattern—this prevents excessive expansion and adds to the bread's rustic appeal.
Bake covered for 45 minutes, then remove the lid and bake for an additional 15-20 minutes until the crust is deep golden brown and sounds hollow when tapped on the bottom. The internal temperature should reach 205-210°F. The bread will have a dense, moist crumb with a crisp, caramelized exterior. Let it cool on a wire rack for at least 1 hour before slicing—this allows the crumb to set properly.
🍽️ Step 5: Finish and Serve
Once cooled, brush the top of the bread with a mixture of 1 tablespoon melted butter and 1 tablespoon honey for added shine and flavor. Sprinkle evenly with 1 tbsp sesame seeds, pressing them gently into the surface. These seeds add a traditional German touch and beautiful contrast to the dark crust.
Slice the bread into ½-inch thick pieces using a serrated knife. Each slice should reveal a dense, moist crumb with pockets of air and a crisp, caramelized crust. The flavor should be complex—malty from the rye, slightly sweet from the honey and molasses, with a subtle tang from the sour starter. Serve warm with butter or your favorite cheese for an authentic German experience.
Pro Tips For Making Authentic German Rye Bread
- Hydrate the Rye First: Soak your rye flour in warm water for 30 minutes before mixing—this breaks down the tough bran and makes the dough smoother. I used to skip this and ended up with a dense, chewy loaf that tasted more like sawdust than bread.
- Feed the Sour Starter Right: Your starter should be bubbly and smell tangy, not flat or alcohol-heavy. If it’s weak, feed it 1:1:1 (starter:flour:water) twice daily for 24 hours before using—this guarantees it’ll lift the dough properly. I learned this after a batch of bread that barely rose.
- Knead Just Enough: German rye dough doesn’t need long kneading—3-4 minutes by hand or 2-3 minutes in a stand mixer with the dough hook is plenty. Overworking it develops gluten, which turns your bread gummy instead of chewy. I used to go for 10 minutes, and the texture suffered.
- Steam the Oven: Place a metal tray on the bottom rack, fill it with boiling water, then close the oven door for 10 minutes before baking. This creates steam that helps the crust form properly and keeps the crumb soft. My first loaves came out dry and cracked because I skipped this.
Best sauces and condiments for this dish
Classic Mustard Spread
German rye bread pairs perfectly with a simple Dijon mustard spread—mix 2 tbsp crème fraîche with 1 tbsp coarse-grain mustard and a pinch of salt. Spread thickly on warm slices for a tangy contrast to the bread’s malty richness.
For extra depth, add 1 tsp honey or a dash of hot honey to balance the heat. 🌟
Sweet Butter Compote
Elevate your bread with a German-style butter compote: melt ¼ cup unsalted butter with 1 tbsp dark brown sugar and 1 tsp cinnamon in a small saucepan. Simmer for 2-3 minutes until fragrant, then drizzle over slices. This sweet-savory combo mirrors traditional Butterbrot pairings found in Bavarian bakeries.
Smoked Salmon & Cream Cheese
For a hearty topping, layer smoked salmon with herbed cream cheese (mix 4 oz cream cheese with 1 tbsp chopped dill, 1 tsp lemon zest, and ½ tsp black pepper).
The smoky, creamy flavors complement the bread’s earthy notes beautifully. This is a nod to Berlin-style open-faced sandwiches, a staple in German cuisine.
Apple Butter Glaze
Transform your rye into a dessert with apple butter glaze: warm 2 tbsp apple butter with 1 tsp cinnamon and ½ tsp vanilla extract in a microwave-safe bowl for 30 seconds.
Spread generously on toasted slices and top with a sprinkle of crushed walnuts for crunch. This sweet pairing is inspired by German Apfelstrudel traditions.
Spicy Honey Mustard
Add a kick with spicy honey mustard: whisk together 2 tbsp honey, 1 tbsp whole-grain mustard, and ½ tsp cayenne pepper. Drizzle over slices and pair with sharp cheddar cheese for a fusion of German and Southern flavors.
This condiment is a crowd-pleaser at Oktoberfest gatherings.
Cheese Pairings
German rye’s tangy depth makes it ideal for cheese boards. Try aged Gouda (for caramelized sweetness) or smoked brie (for creamy richness). For a traditional touch, pair with Limburger cheese**, a bold, pungent blue cheese from the Rhine region.
The contrast of textures and flavors is pure German comfort food. 🧀
Nutrition facts
Frequently asked questions
Why does German rye bread need such a long fermentation?
The extended 12-16 hour fermentation is key to developing the bread's signature tangy flavor and dense texture. This slow process allows the natural acids in the rye flour and sour starter to break down starches, creating that rich, malty depth. The longer fermentation also improves digestibility and enhances the bread's shelf life.
Can I make this bread without a Dutch oven?
Yes, but you'll need to create steam another way. Place a metal tray on the oven rack below your baking sheet, then pour 1 cup hot water into it when baking. This mimics the steam environment of a Dutch oven, helping develop that crisp crust. For best results, bake in a heavy oven-safe pot with a lid instead.
What's the difference between dark rye flour and regular rye flour?
Dark rye flour is made from the entire rye grain, including the bran, giving it that signature deep color and intense malty flavor. Regular rye flour is lighter and milder, similar to whole wheat. For authentic German rye, dark rye is non-negotiable—it provides the rich, earthy taste and dense crumb that defines this bread.
Why did my bread turn out too dense or heavy?
Overmixing or underproofing are common culprits. Rye bread relies on minimal gluten development—mix just until combined. Also ensure your starter is active (it should float in water) and the dough proofs until it springs back slowly when pressed. For lighter texture, try replacing ½ cup of the rye flour with all-purpose flour in future batches.
How can I make this bread gluten-free?
Use a 1:1 gluten-free flour blend designed for bread baking, but expect a denser result. Replace the 1 cup all-purpose flour with the blend and add 1 tsp xanthan gum to improve texture. You may also need to increase hydration slightly (add 1 tbsp extra water) since gluten-free flours absorb differently. Fermentation times may vary—check dough readiness more frequently.